Video editing is a creative and collaborative process that often involves multiple rounds of feedback and revisions. Managing all that work in progress can be challenging, especially with large files, multiple versions, and different tools. That’s why the iSoftStone team loves introducing our clients to the Nuxeo Frame.io connector.
Frame.io is a leading cloud-based video review and approval platform. Using the Nuxeo connector allows you to sync and collaborate on video content from/to Adobe Premiere and other video editing tools. This can help you streamline your video editing workflow and improve your team’s productivity and creativity.
With the Nuxeo Frame.io connector, you can:
- Store master files in Nuxeo and collaborate on lower resolution proxies through Frame.io.
- Export the final approved asset to Nuxeo along with its Frame.io metadata, comments, and annotations.
- Save time by avoiding manual downloads and uploads between Frame.io and Nuxeo.
Installing and working with the connector is straightforward. Here are four easy steps to get you started.
Step 1: Install the Nuxeo Frame.io connector and create binding between Nuxeo and Frame.io accounts
To use the Frame.io connector for Nuxeo, you need to have a Nuxeo instance and a Frame.io account. You also need to create an OAuth 2.0 application on Frame.io and configure it on Nuxeo. You can find the detailed instructions on how to do this on the Nuxeo documentation page.
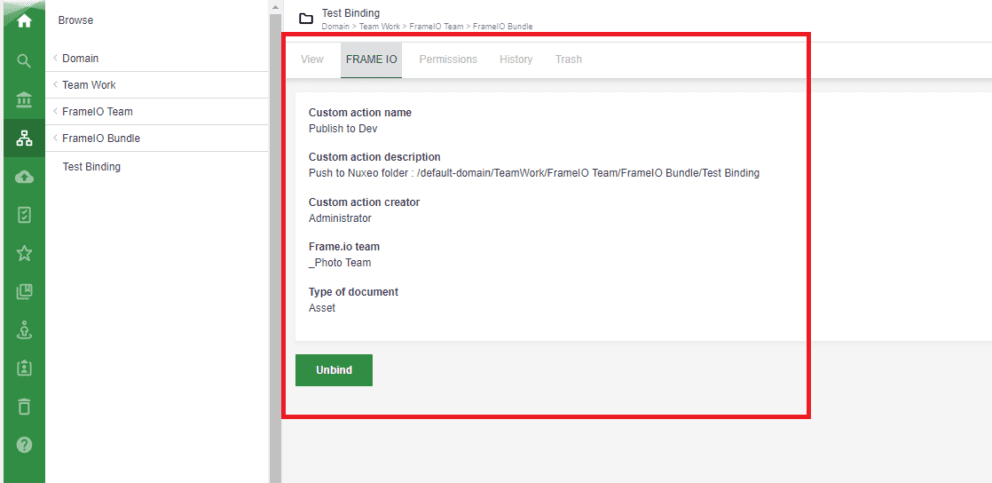
Create the binding between your Frame.io and Nuxeo accounts. First, you need to bind Nuxeo folder and Frame.io together. You’ll be asked to define the action on Frame.io side and then to choose a folder on Nuxeo where you want to send your assets from the Frame.io teams.

Once the binding is created in the Nuxeo folder, the Frame.io tab will show you the action you defined.
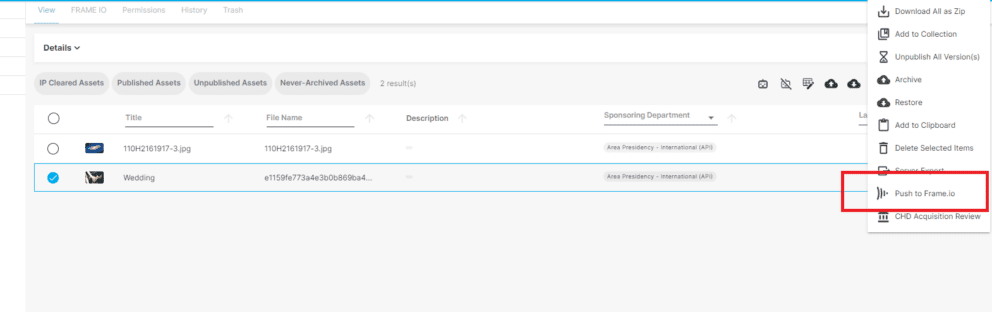
When the add-on is installed, you will see a new action available on your Nuxeo assets called “Push to Frame.io.”
Step 2: Publish your assets to Frame.io
Select them on Nuxeo and click on the “Push to Frame.io” option. You’ll be asked to choose a project and a folder on Frame.io for your assets.
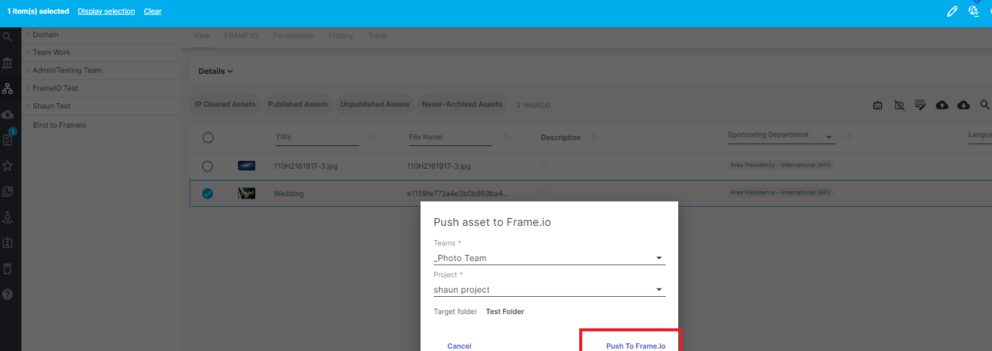
The add-on automatically creates lower resolution proxies of your assets and uploads them to Frame.io. You will see a confirmation message when the push is complete.
Step 3: Collaborate on Frame.io
Once your assets are on Frame.io, you can start collaborating with your team members and stakeholders.
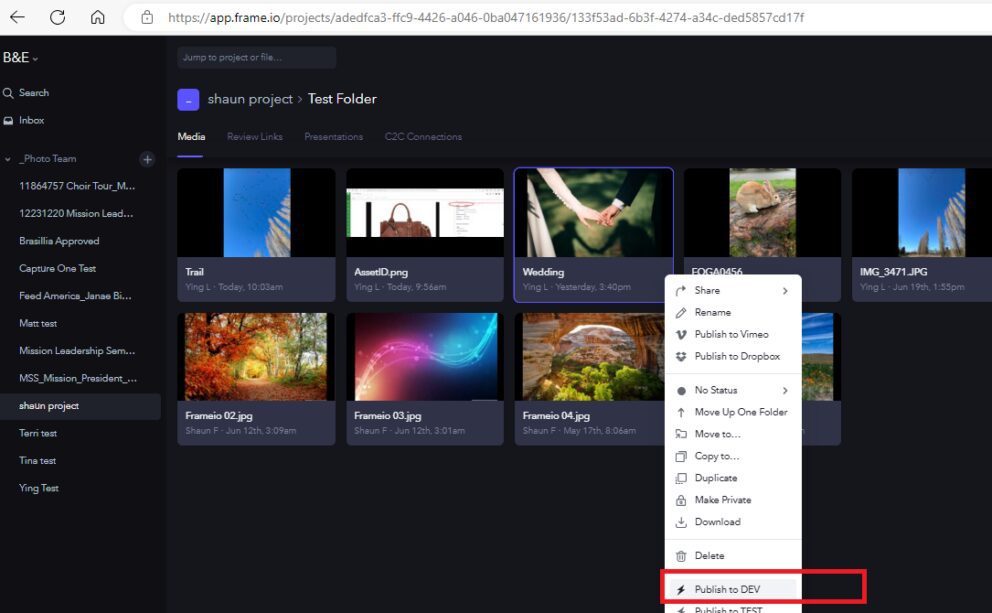
Step 4: Export your final assets to Nuxeo
When you’re done with the review and approval process on Frame.io, you can export your final assets back to Nuxeo along with their metadata, comments, and annotations.
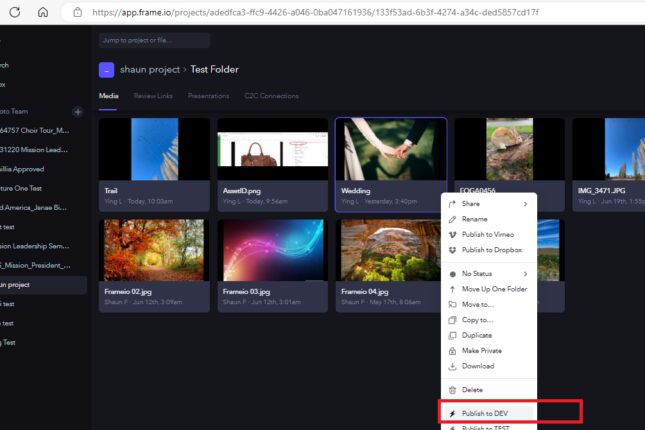
To do this, simply select your assets on Frame.io and click on the “Publish to Nuxeo” option. You can define your own action as you bind Frame.io. [Note: In the example below, we show “Publish to Dev” where your screen will say “Publish to Nuxeo,” our example below shows “publish to DEV.”]
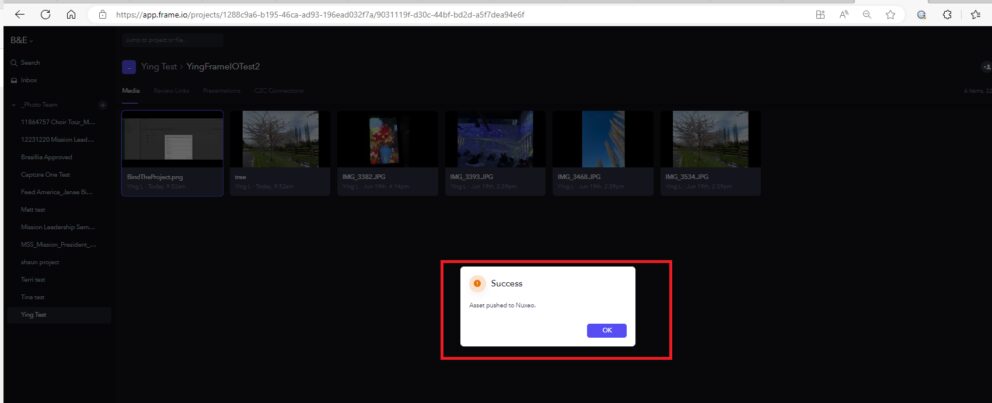
You will get a “success” pop-up notification once your upload is complete.
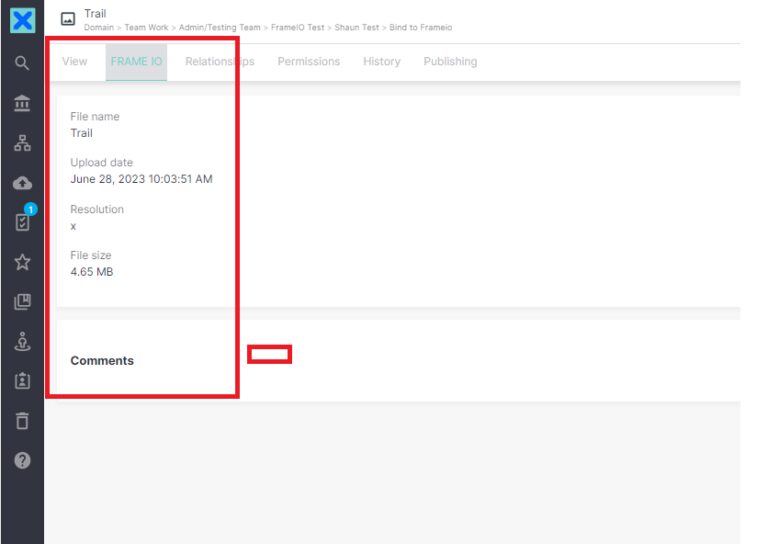
Your final assets will have a new tab called “frame.io” where you can see all the metadata, comments, and annotations from Frame.io.
Ready to try the Nuxeo Frame.io connector?
iSoftstone’s solution team works with you to customize the add-on for your needs. For example, one major customization we’ve already done for a client was to allow their team members to bind folders in the Frame.io account instead of limiting the right only to the team owner. Your requirements might be different. We can help you identify the right opportunities for you and deliver customizations that truly work for you and your teams.
If you’d like to try out the Frame.io connector for Nuxeo or learn more about customizing it, please contact us for a demo. And if you’re already a client who’s using the add-on, we look forward to hearing your feedback!